
Like this article? Support iRunFar by purchasing our book “Where the Road Ends!”
Welcome to this month’s edition of “Where the Road Ends: A Guide to Trail Running!” That’s the name of both this column and the book Meghan Hicks and Bryon Powell of iRunFar published in 2016. The book Where the Road Ends: A Guide to Trail Running is a how-to guide for trail running. We worked with publisher Human Kinetics to develop a book offering the information anyone needs to get started, stay safe, and feel inspired with their trail running. The book Where the Road Ends teaches you how to negotiate technical trails, read a map, build your own training plan, understand the basics of what to drink and eat when you run, and so much more.
This column aims to do the same by publishing sections from the book as well as encouraging conversation in the comments section of each article. We want you to feel inspired and confident as you take on your first few trail runs as well as connected to iRunFar’s community of trail runners!
In this and next month’s articles, we excerpt from Chapter 3 on how to negotiate the variable surfaces upon which we run. One of the joys of trail running is the stimulus it provides to both the body and the mind. Depending on when and where you run, you might run over compacted dirt, loose sand, sloppy mud, wet rocks, deep snow, or slick ice. As you change from one surface to the next, you’ll want to adapt your stride and approach accordingly. This article explains how to travel safely and efficiently on these four different trail surfaces:
- Hard-packed dirt,
- Soft dirt,
- Loose surfaces, and
- Sand.
Terra Firma: Hard-Packed Dirt Trails
Trail runners will often find themselves running on relatively even, firm, dirt trails not dissimilar to paths worn through the grass in a park or on a school campus. The surface is softer than asphalt or cement, but there’s no noticeable give underfoot. And when you brush your hand over the trail, little to no debris slips across the surface.
This surface is about the easiest on which a trail runner can trod! Still, you’ll want to stay alert, be engaged, and be in a position from which you can react quickly. (See last month’s article to learn about the trail runner’s ready position.) The most experienced trail runners will tell you that most of their falls aren’t on the gnarliest bits of singletrack. Instead, they fall when they relax their concentration on the easy stuff and the smallest of obstacles takes them down.
That said, if you have long stretches of well-packed, low-obstacle trail, you can aim to be a bit more efficient. If you’re coming from a road running background, you can move close to the gait you’re used to. For example, you can lower your foot swing a bit, so long as you’re ready to pick up your feet a bit higher when you next approach an obstacle. Likewise, you might relax your arms and shoulders while you try to use as little unnecessary energy as possible.
Holy Grails: Soft Dirt Trails
Somewhere out there lies trail nirvana—an endless singletrack spider web, soft and smooth. These buttery, buffed-out bonanzas are most often found in the forest, particularly conifer forests. Their gift? To give ever so slightly with each step while not noticeably sapping energy.
Like the hard-packed paths previously mentioned, these tempting trails call for basic trail running technique. But the possibility of variable underfoot give from one footfall to the next requires a bit more overall engagement from head to toe.
Although not meant to be the defining characteristics of this section, the fact that these trails are most often found in conifer forests warrants two cautions. First, if you’re running through a forest, you’ll likely encounter roots, possibly quite a few of them. Second, you may find pine needles or loose soil on the surface of the trail. Keep reading to find out how to deal with loose trail surfaces.
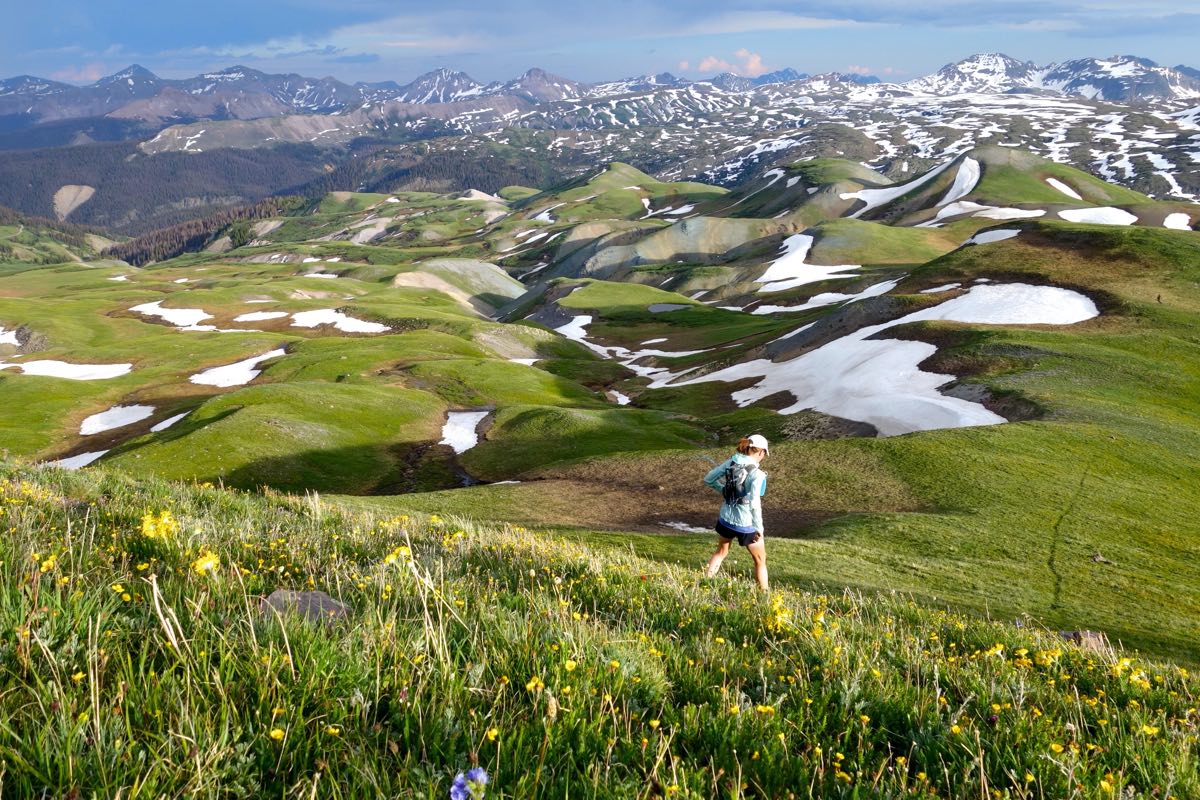
The author Meghan Hicks descending a soft-dirt trail in Colorado. Photo: iRunFar
Slip Slidin’ Away: Loose Surfaces
Just like a bag of marbles emptied on a wooden floor, any loose material that can roll atop the surface of a trail can cause your feet to slide beneath you. Among the plethora of particles that can lubricate your landings are dust, loose dirt, pebbles and gravel, pine needles, pine cones, and many other items.
Although each such surface may behave slightly differently, the same four movement principles we describe in this section apply to all of them. In fact, what you learn here applies in large part to all slippery surfaces, such as mud, ice, and wet rock. It’s one of the key lessons in the book Where the Road Ends and this entire article series!
Minimize Sudden Moves
The most important thing to remember when running on slippery surfaces is to minimize sudden moves. The best way to do this is to be observant and to change your direction or speed gradually. If you don’t do so, you and your foot will tend to continue traveling in the direction you’re moving, just as a car continues in the direction it’s been traveling when it hits an icy patch of road at too fast a speed. But a car traveling smoothly through a turn at 15 miles per hour (24 kilometers per hour) is much more likely to retain enough traction to avoid careening off the road than one traveling at 45 miles per hour (72 kph) or another car traveling much slower but making an abrupt turn. When asked how to maximize traction, 2015 Scottish Hill Running champion Tom Owens said quite simply, “Straight line it.” That’s certainly one way to minimize sudden moves!
Travel at a Safe Speed
If you’re ever feeling out of control or otherwise unsafe on a slippery substrate—be it a loose surface, mud, wet rock, ice, or something else—your default option is to slow down. You might downshift from a run to a jog or from an easy running pace to a walk.
If you do continue running on a slippery surface, travel at a speed at which you can maintain solid contact with the trail. Just as cars going too fast or too slow on slippery roads will be unable to maintain their course because of lost traction, there’s a near-perfect speed for trail running on slippery surfaces. You will find that each surface is different, however, and you will need time and testing to find your right speed on these variable surfaces. Avoid slowing down or speeding up too rapidly, because doing so is a recipe for a fall. Again, remember to walk as needed.
Brake With Caution
If you have to turn or brake quickly on a loose section of trail, try to plant your whole foot evenly on landing and while applying pressure. If you contact the ground with only your toes or your heels, you’re applying pressure over a smaller surface area than if you apply that pressure with your whole foot.
Land Whole Footed
Landing with your whole foot will also help you add a more vertical component to your footfall than usual. Horizontal motion is the real culprit when you keep sliding on a slick surface.
In such situations, you might also want to experiment with a faster cadence. A faster cadence will give you more steps per length of trail and, therefore, allow you to make smaller incremental adjustments as you turn or brake. You can also think about planting your foot under your center of gravity. This technique will help prevent overstriding, when your foot falls in front of your body, bringing the dangerous, horizontal-motion component into play.
Anton Krupicka, two-time winner of the Leadville Trail 100 Mile in Colorado, is no stranger to tackling uncertain footing: “In order to maintain traction on the variable surface that a trail provides, I find it best to run with a short, quick stride where each foot plant is landing roughly under my center of gravity and on my midfoot. By doing this, I’m never 100% committing all of my body weight and momentum to any one footfall, so if that surface or foot plant ends up being unstable I can quickly shift my weight onto the next foot. Running with these less-committing strides lets me respond instantaneously to the trail surface.”
If you do start to slide, go with it. Ride it until your other foot is able to swing forward for your next footfall. Your instinct to correct your motion will be to push against the motion, but that only further sends your foot in the errant direction. Your instinct will also be to raise your arms for balance amidst the slide. This reaction can help you stay upright until you can get your other foot back on the ground.
Life’s a Beach: Sandy Trails
Running on sand is something completely different! What’s more, you might find yourself running on a huge variety of sandy surfaces.
Running on Loose Sand
If the sand isn’t cemented together yet it’s moderately compacted, you’ll notice some give underfoot as soon as you hit it. This sand may slip if you try to turn or stop quickly. If you’re likely to run on this type of loose, sandy surface for very long, test how well the ground holds together underfoot with such actions and act accordingly. If you’re running quickly or running uphill, you might notice the toe of your shoes digging into the sand each time you toe off. There’s nothing particularly wrong with or perilous about this. In fact, you should just go for it if you’re charging up a short, steep, sandy hill.
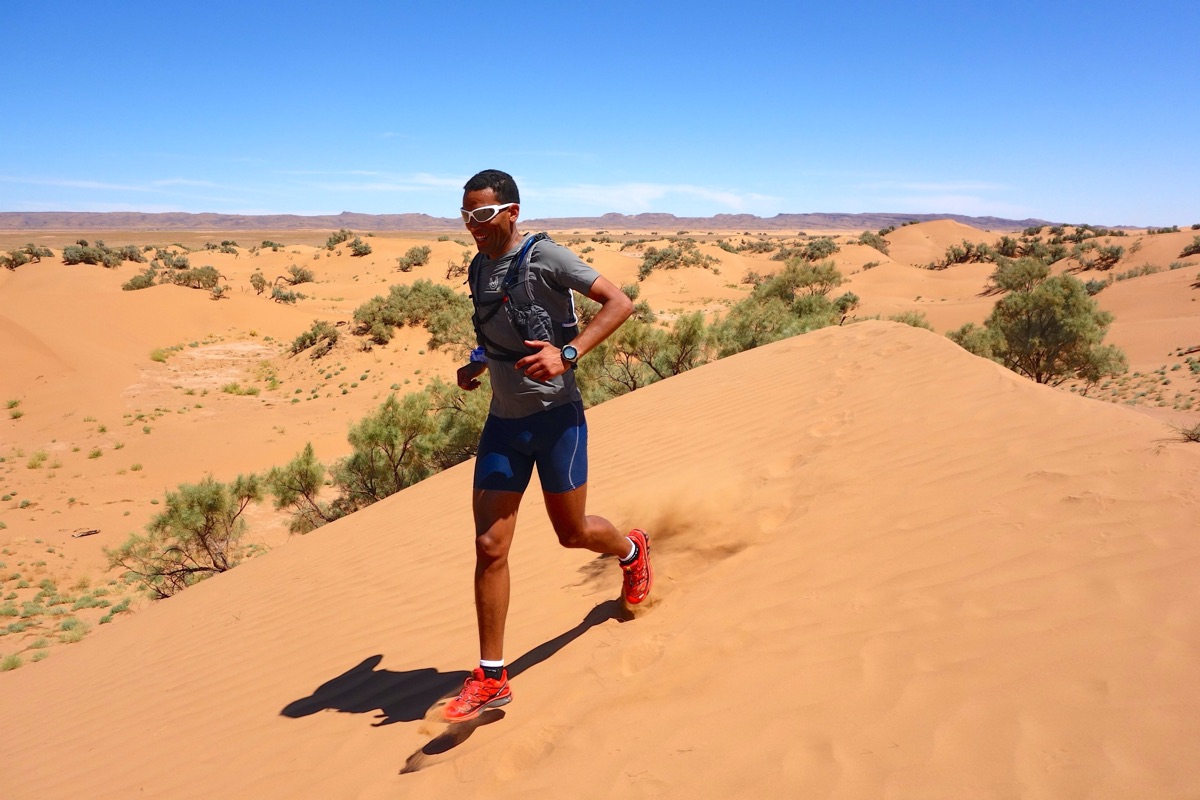
Lhoucine Akhdar running on loose sand in Morocco. Photo: iRunFar
But if you’ll be running on this soft sand for a long time, especially if you’re new to this type of surface, you’ll want to adjust your footfall. That sand giving way under the front of your foot wastes energy and is an invitation for sore calves, Achilles tendons, and more. As with slippery surfaces, you’ll again aim to have a flatter footfall than usual. You do this not so much for traction as for flotation. You want to maximize the surface area of your shoe’s outsole and thus minimize sinking, just as you would use snowshoes to float on snow. Focusing on planting your feet under your center of gravity can help flatten your footfall.
Now, imagine that you’re running on a sand dune, or at least trying to. Away from the beach proper, sand becomes windblown, and running through it is often difficult because it readily gives way underfoot. When ascending, you’ll want to focus even more on having your foot hit the ground parallel to the surface of the sand. If the sand has any sort of crust or cohesion, you might be able to scoot up the climb this way. That said, if you’ve got a short climb on sand, sometimes it’s best just to put your head down (figuratively), dig your toes in, and power up the hill.
On the other hand, running down a trail or bank of unconsolidated sand is a simple joy. It’s one of those times that you can let your guard down and just play. Using an aggressive heel strike is fine (good luck doing much else), because the sand will give enough to absorb the shock.
Running on Wet Sand
Wet sand can act like anything from the most compacted to the loosest of sands. At one extreme, think of the breakwater along many ocean beaches. Along the edge of the water, the surface is firm to slightly yielding, and you can run on it as if you were in a grassy yard. At the other end, firm-looking damp sand might turn out to be an aqueous sludge that easily parts below your feet, quicksand style. If the latter happens and running becomes impossible, just laugh as you walk through it.
Excerpted from Where the Road Ends: A Guide to Trail Running, by Meghan Hicks and Bryon Powell. Human Kinetics © 2016.
Call for Comments
- What tips do you have for running on hard-packed trails, soft-dirt trails, loose surfaces, and sand?
- What are the trail surfaces that present the most challenge for you? How do you negotiate them?
- Next month, we’ll talk about how to move among rocks and other visible and hidden obstacles, mud, and snow. What would you like to learn about running on those surfaces?
